

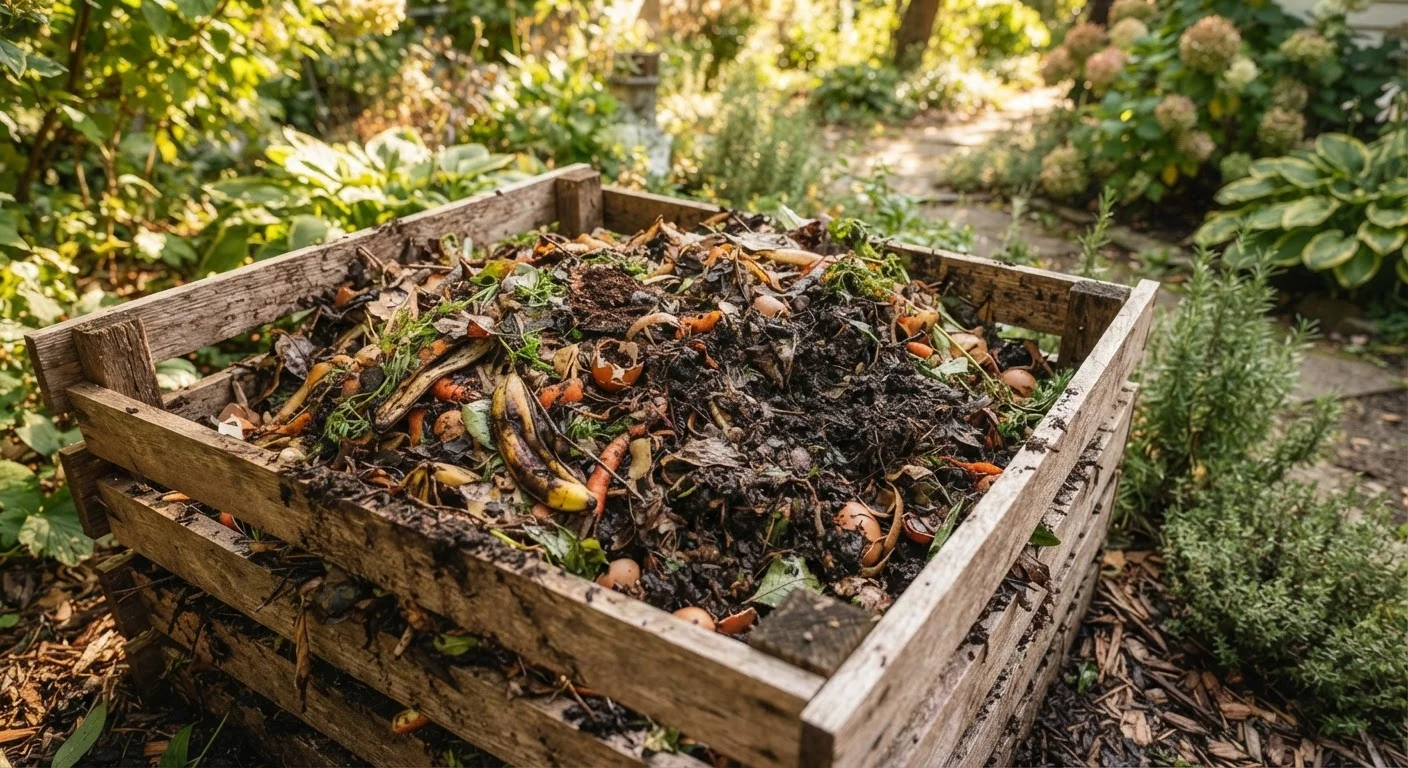
Why Composting Is Worth Your Time
Compost improves nearly every soil type. Sandy soil gains better water retention; clay soil gains improved drainage and aeration. In both cases, compost introduces and feeds the microbial life that makes nutrients available to plant roots. If you are starting a vegetable garden, well-made compost is one of the most impactful amendments you can work into beds before planting.
Beyond soil health, home composting diverts organic waste from landfills, where food scraps decompose anaerobically and produce methane. Keeping that material in your yard closes a natural nutrient cycle that benefits your garden season after season.
Compost also pairs well with other soil-care practices. Combined with proper mulching techniques, a top-dressing of finished compost helps suppress weeds, lock in moisture, and steadily improve the soil layer beneath.
What you will need
What You Will Need
Setting up a home compost system requires minimal equipment. A functional pile can be started with materials you may already have on hand.
Compost bin or pile enclosure
Contains materials, retains heat, and keeps the pile tidy throughout the composting process.
Garden fork or compost turning tool
Aerates the pile by turning materials to introduce oxygen and speed decomposition.
Small kitchen compost collector
Holds daily kitchen scraps at the counter until they are ready to transfer to the outdoor bin.
Garden hose or watering can
Adds moisture when the pile becomes too dry to support active microbial breakdown.
Compost thermometer
Monitors internal pile temperature to confirm active decomposition (ideally 130–160°F).
Once your system is established, maintenance becomes a routine part of kitchen and yard habits. Many gardeners keep a small covered container on the counter to collect scraps throughout the week before transferring them to the outdoor bin.
Step-by-Step: Building and Managing Your Compost Pile
Follow these steps to set up a productive compost system. Whether you are working with a tumbler, a wooden bin, or a simple open pile, the underlying principles are the same.
Never Compost These Materials
Meat, fish, bones, dairy products, and cooking oils should never go into a home compost pile. They decompose slowly, create strong odors, and attract rodents and other pests. Similarly, avoid composting pet waste, diseased plant material, or anything treated with persistent herbicides, as these can introduce pathogens or chemical residues into soil you plan to use in food gardens.
Choose and Set Up Your Composting System
Select a location that gets partial sun and is reasonably convenient to your kitchen door and garden beds. Avoid placing the bin directly against a wooden fence or structure to prevent moisture damage. You have three main options:
- Open pile: The simplest approach — just pile materials in a corner of the yard. Works well but can look untidy and is harder to manage.
- Wire or wooden enclosure: Easy to build, allows good airflow, and keeps the pile contained. Ideal for most yards.
- Compost tumbler: A sealed rotating drum that heats up quickly and deters pests — a good option for smaller spaces or where wildlife is a concern.
Set the bin directly on bare soil, not on concrete or pavers, so earthworms and soil organisms can migrate into the pile.
Understand Browns and Greens
Successful composting depends on balancing two categories of materials:
- Browns (carbon-rich)
- Dry leaves, cardboard torn into small pieces, paper towel rolls, straw, wood chips, and paper bags. These provide structure and energy for microbes.
- Greens (nitrogen-rich)
- Vegetable and fruit scraps, coffee grounds and filters, tea bags (paper only), fresh grass clippings, and plant trimmings. These supply the protein microbes need to multiply.
A general guideline is to aim for roughly equal volumes of browns and greens — though leaning slightly heavier on browns helps prevent odor and sogginess. If your pile smells or feels slimy, add more browns. If it seems dry and inactive, add more greens.
Layer Your Starting Materials
To kick off your pile, begin with a 3–4 inch layer of coarse browns at the base — wood chips or small sticks work well here because they promote airflow from below. Add a layer of greens on top, then alternate layers as you add materials over time. There is no need to be perfectly precise; the layering concept simply ensures materials are mixed rather than clumped together in one large mass.
Water lightly after the first few layers if conditions are dry. The pile should feel consistently moist throughout — similar to a wrung-out sponge.
Turn and Maintain the Pile Regularly
Turning introduces oxygen, which is essential for aerobic (odor-free) decomposition. Use a garden fork or compost turning tool to move material from the outside edges into the center, and from the top down toward the bottom. A well-aerated pile can reach internal temperatures of 130–160°F, which accelerates breakdown and kills weed seeds.
Turn the pile every one to two weeks for fastest results. If you are less hands-on, turning once a month still produces good compost — it just takes longer.
Recognize When Compost Is Finished
Finished compost no longer resembles its original ingredients. Look for these signs:
- Dark brown or black color throughout
- Crumbly, soil-like texture
- Earthy smell — similar to forest floor, with no sourness or ammonia
- Reduced volume compared to when materials were first added
If you can still identify recognizable food scraps or leaves, the compost needs more time. Move unfinished material to a new pile and allow the finished portion to cure for two to four additional weeks before use.
Watch Your Pile's Moisture Level
A pile that is too wet will become anaerobic and produce unpleasant odors — a sign that beneficial microbes are suffocating. A pile that is too dry will stall decomposition entirely. Aim for the moisture level of a wrung-out sponge, and adjust by adding dry browns when the pile smells, or sprinkling water when materials look dusty and pale.
Speed Up Decomposition Naturally
Chop or shred materials before adding them — smaller pieces break down significantly faster because they expose more surface area to microbial activity. Coffee grounds, fresh grass clippings, and crushed eggshells are particularly effective activators that can help a slow pile get moving again.
Using Finished Compost in Your Garden
Once your compost has cured and passed the visual and smell checks, it is ready to put to work. Work 2–3 inches of compost into the top 6–8 inches of garden soil before planting each season. For established beds, spread compost as a top-dressing around plants and let rain and earthworms work it into the soil over time.
Finished compost also makes an effective potting mix component — blend it with other materials for container growing. If you are exploring container gardening on patios or balconies, homemade compost can meaningfully improve commercially prepared potting mixes.
For long-term planning, incorporating compost application into your seasonal garden maintenance routine — particularly in early spring and late fall — helps you build soil quality steadily over several growing years. Healthy, compost-enriched soil also tends to support fewer problem weeds; if you notice persistent weed pressure, what those weeds reveal about your soil can offer useful diagnostic insight.
The content on this site is for informational purposes only and is not a substitute for professional advice. Always consult a qualified professional for guidance specific to your situation.