

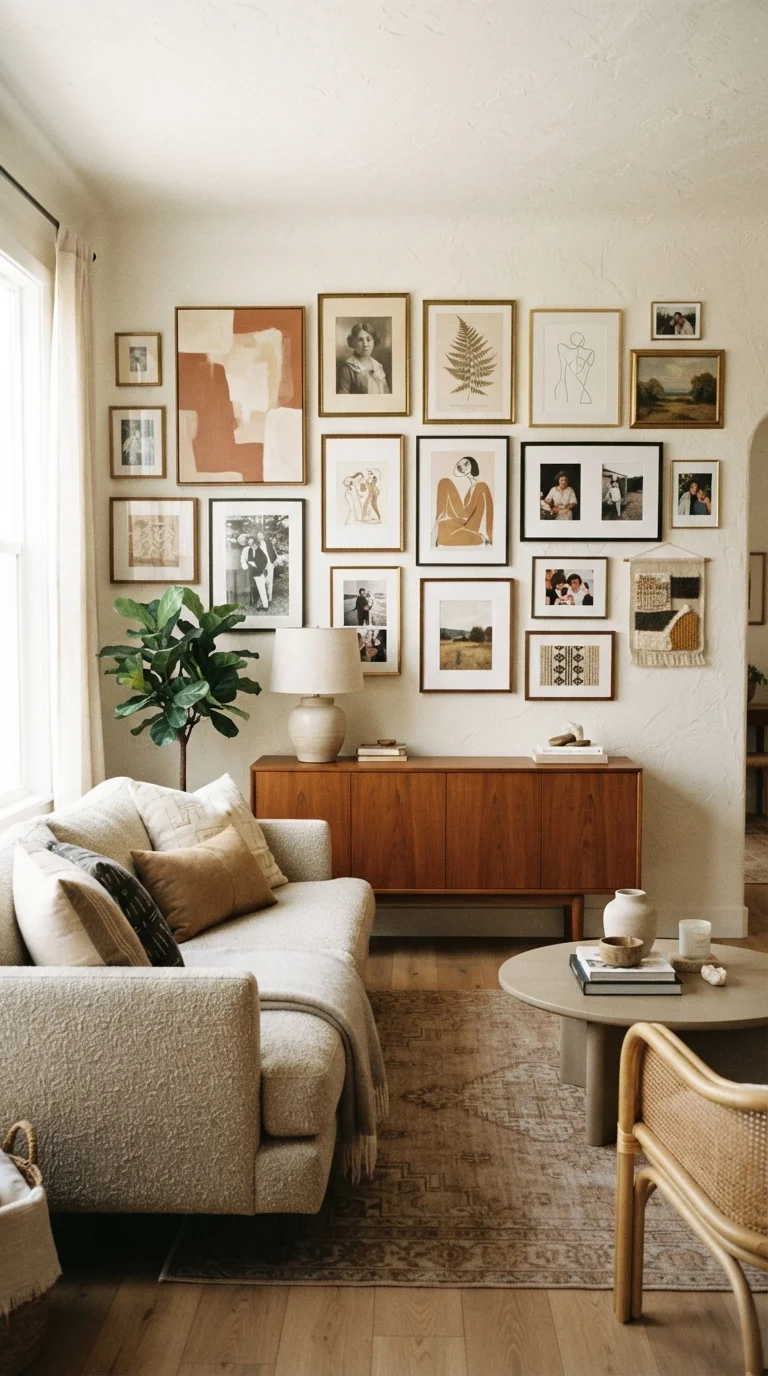
Why Gallery Walls Fail — and How to Avoid It
A gallery wall done well looks curated and personal. Done poorly, it looks like a collection of things that never found a better home. The difference almost always comes down to planning, not the artwork itself.
The most common pitfall is hanging pieces one at a time, adjusting as you go. This almost guarantees uneven spacing and a layout that drifts off-center. The second pitfall is ignoring visual weight — mixing a large, dark-framed canvas with tiny, lightweight prints without any connective logic makes the eye work too hard.
Understanding a few core design principles like balance and rhythm goes a long way before you pick up a hammer. A unifying element — whether that's a consistent frame finish, a shared color palette in the artwork, or a single theme like travel photography — gives viewers something to follow.
What you will need
Gathering Your Materials and Choosing Your Pieces
Before anything goes on the wall, assemble everything you're considering for the display. Lay it all on the floor or a large table. This is the moment to edit ruthlessly — not every piece you own belongs in the same arrangement.
Aim for variety in size: a gallery wall made entirely of identically sized frames looks rigid. A mix of at least three different frame sizes creates movement. That said, limiting your frame finishes to two or three tones (for example, black, natural wood, and one metallic) prevents the display from fragmenting visually. If you're blending old family photos with newer prints, see how combining vintage and contemporary pieces can actually add richness rather than chaos.
Tape measure
Measure wall space and calculate consistent gaps between frames.
Painter's tape
Mark the outer boundary of the arrangement on the wall before hanging.
Kraft paper or newspaper
Trace each frame to create paper templates for precise, hole-free layout testing.
Hammer and picture-hanging nails
Secure frames to the wall at marked positions.
Level (spirit or laser)
Ensure each frame hangs straight and rows stay horizontally aligned.
Pencil
Mark nail positions on the wall after confirming template placement.
Adhesive picture strips
Hang lightweight frames without nails, useful for renters or frequently changed displays.
Planning and Hanging Your Gallery Wall
With your pieces selected and your wall space measured, you're ready to plan the layout and hang with confidence. Follow these steps in order — skipping ahead is the fastest route to crooked frames and unnecessary wall damage.
Measure Your Wall and Define the Arrangement Area
Using your tape measure, note the width and height of your available wall space. Decide on the overall footprint of the gallery — typically this means staying within a rectangle you'd hang roughly 57–60 inches from the floor at center (a standard eye-level guideline). Mark the boundary lightly with painter's tape directly on the wall so you have a visible target.
Create Paper Templates for Every Frame
Lay each frame face-down on kraft paper or newspaper and trace its outline. Cut out the shape and label it with the frame's name or artwork title. On the back of each template, measure and mark where the hanging hardware hits — this is where the nail will go. This step eliminates guesswork and saves your walls from trial-and-error holes.
Arrange Templates on the Floor First
Lay all your paper templates on the floor within a space matching your wall dimensions. Experiment with arrangement: start by placing your largest or most visually dominant piece near the center, then build outward. Aim for 2–3 inches of gap between each frame. Step back and look from a distance — does the group feel balanced? Adjust until the layout feels intentional before touching the wall.
Transfer Templates to the Wall
Using painter's tape, affix each paper template to the wall in your planned positions, maintaining your target gaps. Step back and evaluate the arrangement at eye level — proportions can look different vertically than they did on the floor. Make adjustments now, while everything is still just paper and tape.
Mark Nail Points and Remove Templates
Once the layout is confirmed, press through each template at the hardware-mark position with a pencil to leave a dot on the wall. Remove the paper templates one at a time and drive your nail or picture hook at each marked point. Use your level to verify each nail is straight before committing. For heavier frames on drywall, locate studs or use appropriate wall anchors rated for the frame's weight.
Hang Frames and Check Alignment
Hang each frame starting from your center anchor piece and working outward. After placing each frame, hold your level across the top and adjust before moving on. Once all pieces are up, use your level horizontally across a row of frames to confirm they share a consistent baseline or top edge, depending on your design intent.
Refresh the Display Over Time
A gallery wall doesn't have to be permanent. Swapping one or two pieces seasonally — or as you acquire new artwork — keeps the display feeling current. Because your nail positions are already in place, updates take minutes rather than hours. This flexibility is part of what makes gallery walls one of the most cost-effective ways to transform a room.
Once everything is up, step back and assess from across the room. Minor adjustments are normal. If a frame looks visually heavy in one corner, try swapping it with a lighter piece nearby. A well-executed gallery wall becomes one of the most personal features in a room — and if you're refreshing multiple spaces, the room-by-room décor refresh checklist can help you identify where a gallery wall would have the most impact.
Should you ever need to patch holes after rearranging or taking down frames, the Weekend Wall Repair Checklist covers everything you'll need to restore your walls cleanly.
The content on this site is for informational purposes only and is not a substitute for professional advice. Always consult a qualified professional for guidance specific to your situation.