

Why Doors Stop Latching — and What's Actually Happening
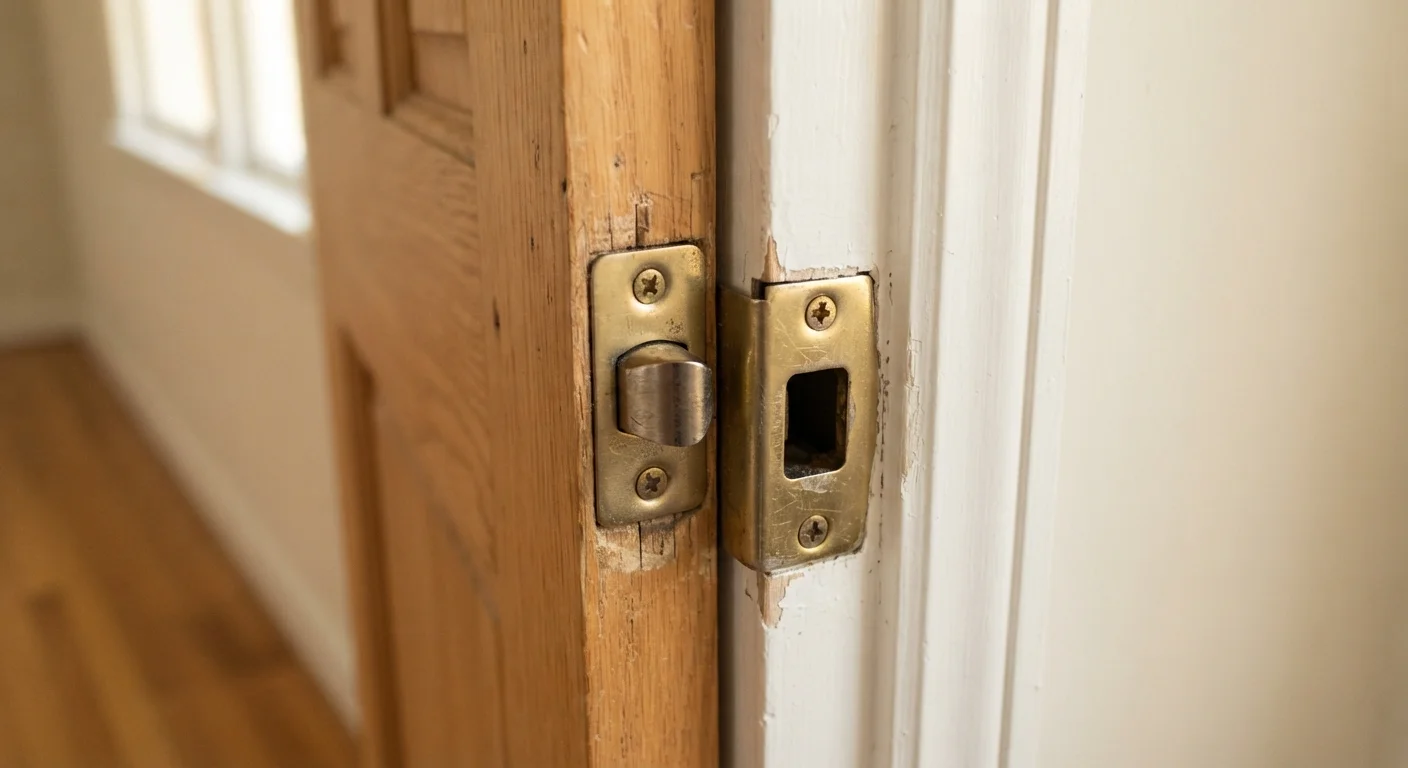
A door that refuses to latch cleanly is almost always a geometry problem: the latch bolt and the strike plate opening are no longer in the same plane. Understanding what shifted tells you which fix to apply.
Common causes include:
- Hinge screws working loose over years of use, allowing the door to sag on one side
- Seasonal wood movement — wood expands in humid summer months and contracts in dry winter air, shifting the door in its frame
- Foundation or structural settling, which can rack a door frame out of square over time
- Paint buildup on hinges or the door edge, effectively raising the door's resting position
Most of these issues are correctable with basic tools and an hour of focused effort. The steps below walk through diagnosis first, then targeted fixes ranked from simplest to most involved.
What you will need
Tools and Materials You'll Need
Gather the following before you start. Having everything on hand prevents mid-repair interruptions and keeps the project moving efficiently.
Phillips-head screwdriver
Tightening or removing hinge screws and strike plate screws.
Wood chisel and mallet
Deepening or repositioning the strike plate mortise in the door frame.
Lipstick, crayon, or chalk
Marking the latch bolt to identify the exact point of misalignment.
Longer replacement screws (3-inch)
Replacing stripped hinge screws to restore a solid anchor into wall framing.
Toothpicks and wood glue
Filling stripped screw holes before re-driving screws for a secure hold.
Metal file or rotary tool
Enlarging the strike plate opening slightly when the latch bolt is close but not catching.
Utility knife
Scoring paint or finish around the strike plate before chiseling to prevent splintering.
Step-by-Step: Diagnosing and Fixing the Latch
Use the Lipstick Test for Precision
Rub a small amount of lipstick, crayon, or chalk on the latch bolt, then slowly close the door until the bolt contacts the strike plate. Open the door and look at the mark left on the plate or surrounding frame — it tells you exactly which direction the bolt is missing, saving you guesswork before you pick up any tools.
Observe and identify the type of misalignment
Close the door slowly and watch what the latch bolt does. Note whether it:
- Hits the face of the strike plate (too high or low)
- Barely misses the opening (too far in or out)
- Catches briefly but springs back (hole is close but shallow)
This observation narrows your repair path before you touch any tools.
Use the lipstick test to pinpoint contact
Apply lipstick, chalk, or crayon to the latch bolt face. Gently close the door until the bolt makes contact, then open it. The mark on the strike plate or frame shows exactly where contact is occurring — and in which direction the bolt is missing the opening.
Check and tighten all hinge screws
Open the door fully and inspect every screw in both the door-side and frame-side hinges. Loose hinge screws are the single most common cause of a sagging door that won't latch. Tighten each screw firmly. If any spin without gripping — a stripped hole — do not ignore it.
To fix a stripped hole: snap toothpicks into the hole with a drop of wood glue, let dry for 30 minutes, snap off the excess flush, then re-drive the original screw. For a more durable fix, replace the shortest hinge screws with 3-inch screws that reach into the wall's structural framing.
Adjust or reposition the strike plate
If the latch bolt is close but consistently misses the opening in one direction, moving the strike plate is often the cleanest fix.
- Remove the strike plate screws and pull the plate free.
- Use a utility knife to score around the existing mortise (the recessed pocket) to prevent tearing the finish.
- Use a sharp chisel and mallet to extend the mortise in the direction needed — typically up, down, or deeper.
- Reposition the strike plate over the adjusted mortise and screw it back in place.
- Fill any exposed gap left by the old position with wood filler and touch up with paint.
File the strike plate opening if the gap is minor
When the misalignment is small — 1 to 3 millimeters — filing the strike plate opening is faster than repositioning the entire plate. Use a metal file or rotary tool to enlarge the strike plate hole in the direction the lipstick test indicated. Work gradually, testing the latch after every few strokes.
Test the latch and confirm secure operation
Close the door fully without holding the knob and confirm the latch clicks into place on its own. Then test the knob or lever: turn it, pull the door open, and release. The latch should spring back cleanly. Finally, check that the door sits flush in the frame with no visible gaps along the top, latch side, or bottom.
If the door still binds or fails to latch after completing these steps, the frame itself may have shifted beyond what hardware adjustment can correct — at that point, consult a professional carpenter or contractor.
Know When to Call a Professional
If your door frame shows signs of significant structural movement — such as visible cracks in surrounding drywall, a visibly bowed frame, or gaps larger than ½ inch — the issue may be related to foundation settling or structural framing. In those cases, stop DIY repairs and consult a licensed contractor. Continuing to force or trim the door without addressing an underlying structural problem can cause further damage.
Preventing the Problem from Recurring
Once your door latches reliably, a small amount of maintenance keeps it that way. Check hinge screws annually — a simple tightening pass each fall takes under five minutes and catches early loosening before it causes latching problems.
For exterior doors, ensure weatherstripping isn't compressing unevenly, which can push the door out of alignment. Interior doors benefit from a light pass of paste wax along the latch bolt once a year to reduce friction wear.
Don't Over-Plane or Over-Trim
Removing too much material from a door edge to compensate for misalignment can permanently weaken the door or create gaps that compromise weatherproofing and security. Always adjust the strike plate or hinges first before considering any trimming of the door itself.
If you notice the latch starting to miss the strike plate only in summer, seasonal wood expansion is the likely culprit. Rather than re-adjusting hardware twice a year, filing the strike plate opening slightly (Step 5) creates enough clearance to accommodate normal seasonal movement without repeated interventions.
The content on this site is for informational purposes only and is not a substitute for professional advice. Always consult a qualified professional for guidance specific to your situation.